Euro Mount Deer: A Comprehensive Guide to Preserving Your Trophy
As hunters, we invest significant time and effort in ensuring a successful hunt. From scouting and gear selection to meat care and logistics, meticulous planning is crucial. However, one aspect often overlooked is trophy care, specifically how to preserve the animal after a successful harvest. Among the various preservation methods, the European mount stands out as an affordable and visually appealing option. This guide provides a detailed, step-by-step process for creating a high-quality Euro Mount Deer yourself.
A properly cleaned skull offers a striking and cost-effective way to commemorate a successful hunt. With the right techniques, even DIY enthusiasts can achieve professional-looking results. The key lies in understanding the process and following specific steps for head removal, skinning, cleaning, whitening, and finishing.
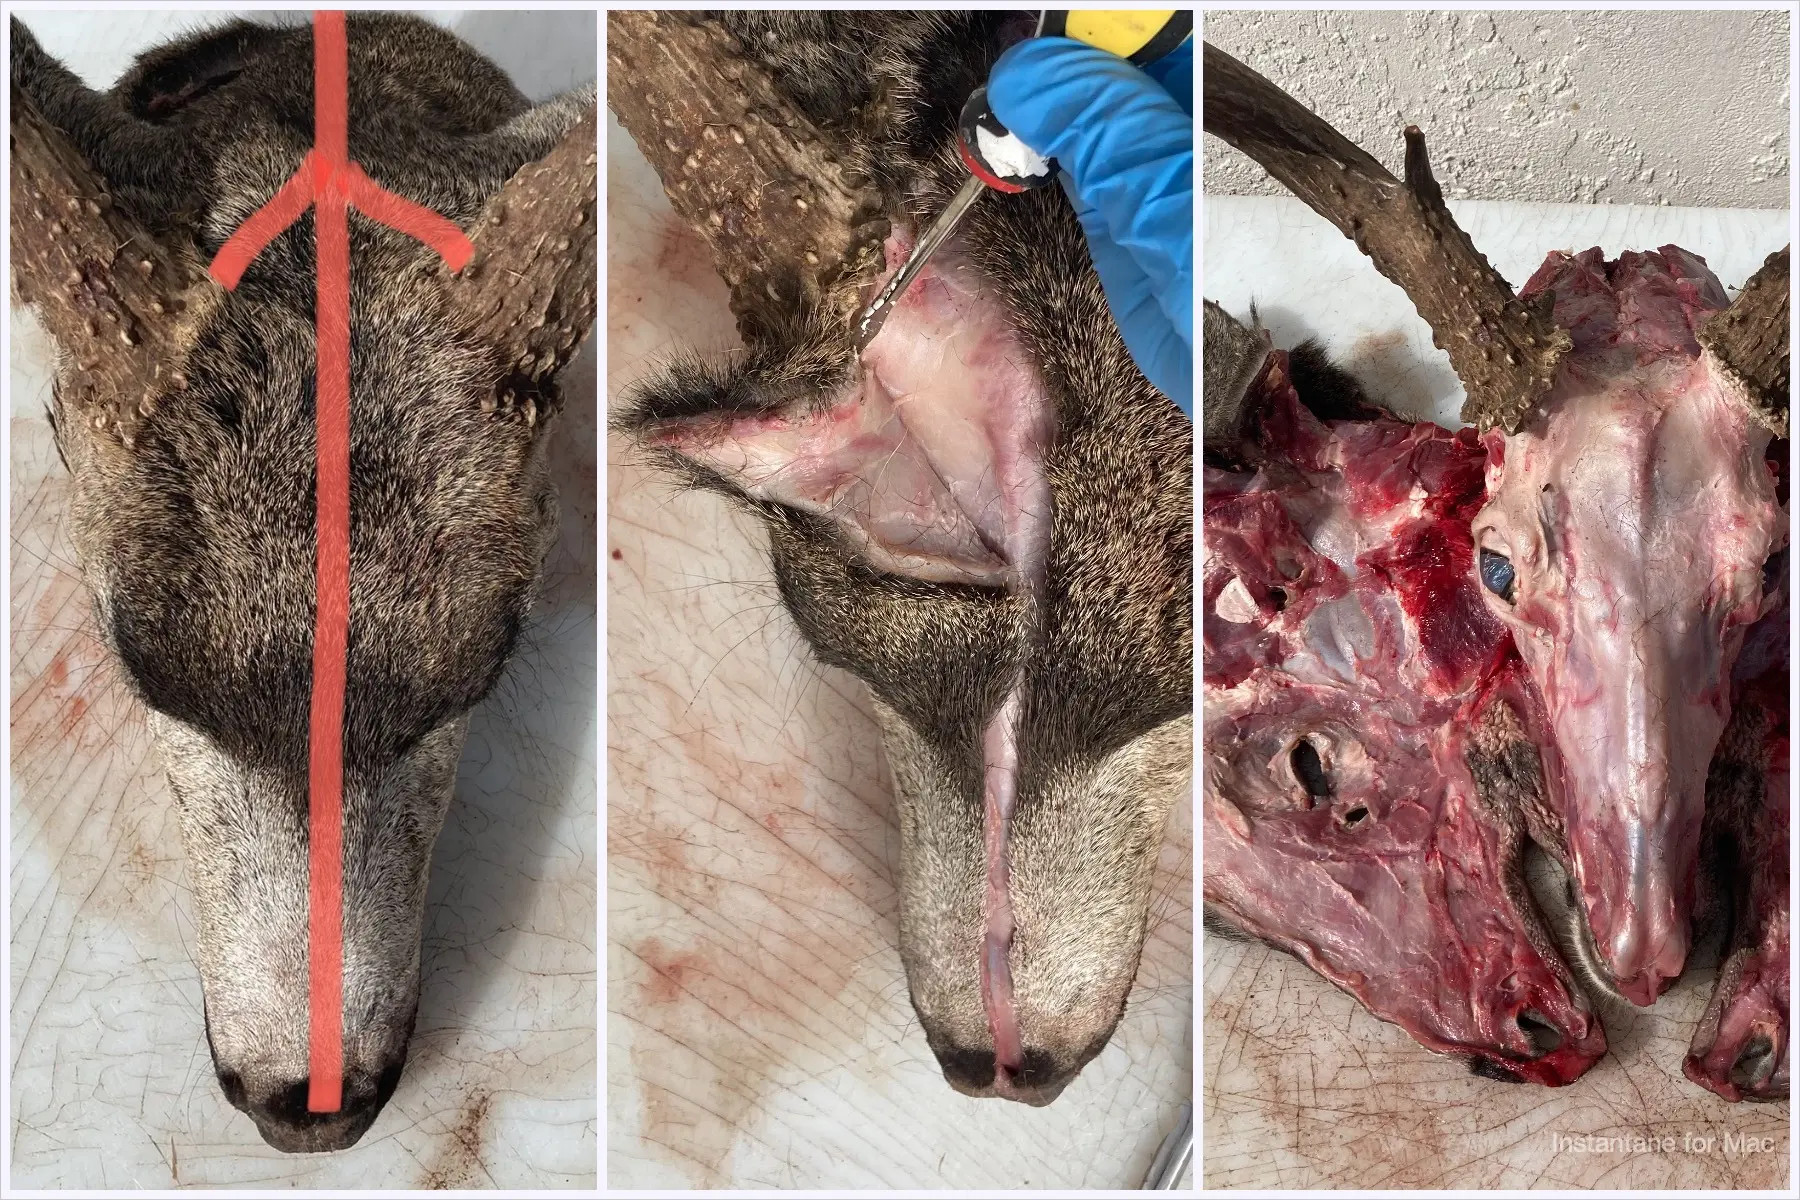
The first step involves careful head removal and skinning. Remove the head at the atlas joint, where the skull connects to the neck, to minimize meat waste and simplify the cleaning process. Ideally, leave the hide on to prevent the skull from drying out and causing issues during whitening. If you must remove the hide for transport, use a sharp knife, starting from the back of the head and working towards the snout. Avoid scoring the bone with the knife, especially around the antler burrs. Use a flat-head screwdriver to carefully pry the hide away from these areas. Meticulously work around the eyes and tear ducts, then remove the ears at the base of the skull. Take extra care around the nose to avoid damaging the delicate cartilage and bone.
Next, remove the lower jaw by making incisions along the outside of the jawbone on both sides. Open the mouth until the lower jaw detaches, then cut away any remaining muscle and connective tissue. Remove the eyes by making an incision around the eyeball and cutting the connective tissue behind it. Clean as much meat as possible from the skull to expedite the cleaning process.
Brain removal is crucial for effective cleaning. Use a drill with a 5/8″ flat spade wood bit to liquefy the brain matter inside the skull. Alternatively, a screwdriver or sturdy stick can achieve the same result. Flush out the liquefied brain matter with a pressure washer or water hose.
Maceration is a highly effective cleaning method. This involves soaking the skull in water maintained at 80-90 degrees Fahrenheit to promote bacterial growth, which breaks down remaining tissue. Use a watertight plastic container, a stainless steel fish tank heater, and plastic wrap to protect the antlers. Submerge the skull completely, ensuring the heater remains underwater. The process typically takes 4-6 days for a deer-sized animal. Monitor the water level and replenish as needed. Once the meat has sufficiently decomposed, rinse the skull thoroughly, taking care not to damage the softened bones.
Whitening the skull enhances its visual appeal. Use a 50/50 solution of 3% hydrogen peroxide and water, brought to a rolling boil in an outdoor burner. Submerge the skull for 5-10 minutes, protecting the antlers with plastic wrap and tape. Monitor the whitening process closely and remove the skull periodically to check the color.
Finally, dry the skull in direct sunlight or using a space heater. Secure loose nasal bones with a rubber band. Once dry, glue any loose teeth or bones back in place with super glue. Touch up any whitened antler areas with Minwax wood stain. Seal the bone with a thin coat of Mop & Glo to prevent dust accumulation and impart a pleasant scent.
By following these steps, you can create a stunning euro mount deer that showcases your hunting prowess and provides a lasting tribute to your trophy. The result is a beautifully preserved memento that will last a lifetime.